How To Send Mail Via Azure App
Step 1: Create an app registration
First, you need to create an app registration in PIM+. If you have already created an app registration, you can skip this step.
Step 2: Add permissions
After running the installer, add the following permissions to your app registration:
- Go to API permissions in your Azure app registration.
- Click Add a permission.
- Select Microsoft Graph.
- Choose Application permissions.
- Search for and add Mail.Send.
Make sure to grant admin consent for the added permission.
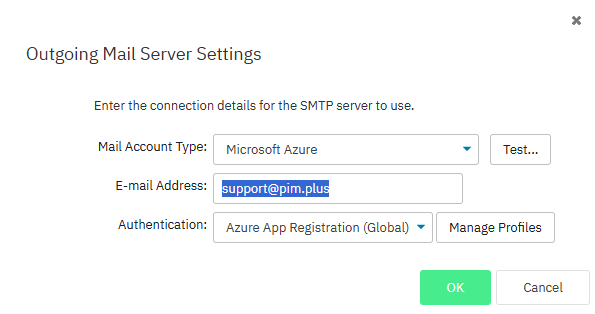
Step 3: Add E-Mail server in PIM+
In PIM+, go to Settings > Notifications: Email Settings. Add a new mail server by clicking the Add Outgoing Mail Server button.
Step 4: Configure Email Settings in PIM+
- Select the type:
Microsoft Azure - Add a known E-mail Address This should be a mailbox that exists in your Azure tenant
- Use the App Registration for authentication
Step 5: Test It
- Now that the mail server has been added, you can test it by clicking Test... in the settings.
- Enter a valid email address to confirm that emails can be sent successfully.