Technical Resources
Running on IIS
Running PIM+ on IIS
This article explains how to run PIM+ on IIS. It provides pictorial examples with each step to help you navigate the software's interface. By default, the user interface is accessed through a web server that is integrated right in PIM+. The integrated web server makes for quick and easy deployment without the need to install and configure IIS.
However, there are certain times when you may prefer to access the PIM+ user interface through IIS and this is fully supported. Reasons to switch to IIS may include corporate policy or the need to use HTTPS/SSL to protect access to the console.
Step 1: Disable the Integrated Web Server
- Go to the e.g.
C:\Program Files\pimplusfolder. - Edit the file called
config.iniusing Notepad. - Look for the section called
[WebServer]followed by an entry calledEnabled=1and change it toEnabled=0.

If the Enabled line is not present in your config.ini file add it manually under the [WebServer] section.
- Restart the PIM+ service.
Step 2: Install IIS
- Open Server Manager on your Windows server.
- Click on Add roles and features.
- In the wizard, select Role-based or feature-based installation and click Next.
- Select your server from the server pool and click Next.
- Under Server Roles, check the box for Web Server (IIS).
- Expand the Web Server (IIS) section, then expand Web Server > Application Development.
- Turn on the option for "ASP.NET 4.7" or "ASP.NET 4.8".
- Click Next and proceed through the wizard to install IIS and the selected features.
- When the installation is complete, close the wizard.
Step 3: Install a Self-Signed Certificate
- Open the IIS Manager in the Administrative Tools section of the Control Panel.
- Select the top level item which has the same name as the local system.
- On the right-hand side double-click on the item called "Server Certificates".
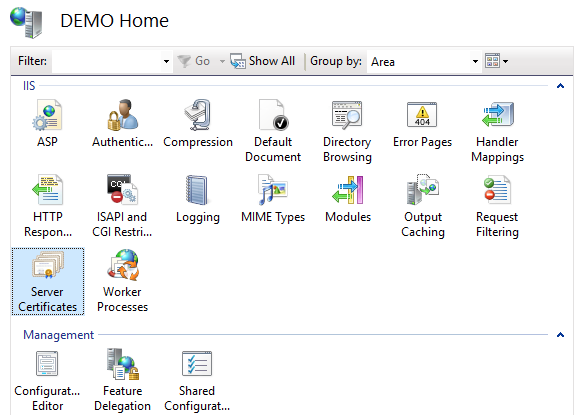
- In the Actions menu on the very right-hand side select "Create Self-Signed Certificate".
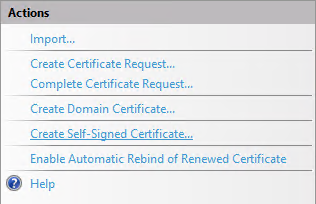
- Enter a name for the certificate and press OK.
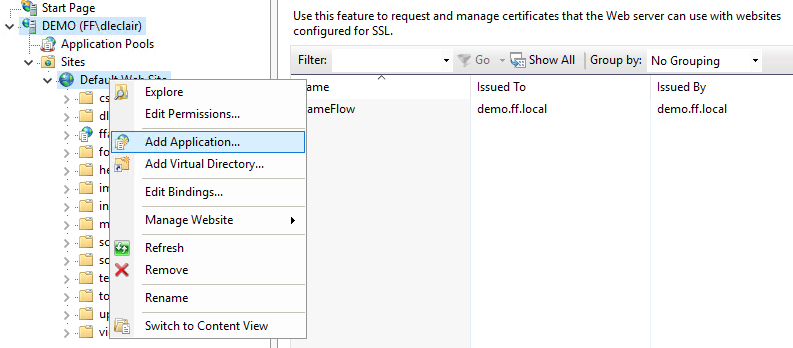
- Navigate to the "Default Web Site" item in the IIS Manager.
- Right-click on "Default Web Site" and select "Edit Bindings".
- Use the Add button to add an HTTPS binding on port 443 with your newly created certificate.
- When adding the HTTPS binding, turn on the option labeled "Disable HTTP/2"
- Use the Remove button to remove the HTTP binding on port 80 so that HTTPS/SSL is required to access the site.
Step 4: Edit Basic Settings
- In the IIS Manager navigate to the "Default Web Site" site under the "Sites" folder.
- In the toolbar on the right select "Basic Settings..."
- For the alias specify "PIM+".
- For the physical path enter e.g.
C:\Program Files\pimplus\Html.- If you have installed PIM+ in a non-default location use that location instead.
Step 5: Configure Application Pool
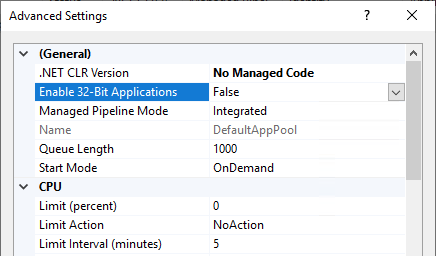
- Right-click on "DefaultAppPool" and choose "Advanced Settings".
- Verify ".NET CLR Version" is set to "v4.0".
- Verify "Enable 32-bit Applications" is set to "False" and press OK.
Step 6: Verify HTTPS/SSL Access
- Verify that you can access the user interface through HTTPS/SSL by visiting
https://servername/. - Your web browser may warn about the self-signed certificate before allowing you to proceed.
Step 7: Update Remote Node Configurations
- On each remote node, edit the file
config.iniin theC:\Program Files\PIM+folder. - Edit the
MasterNodevalue to start withhttps://.